Adding a New Gig to the Pipeline
Follow these steps to add a new gig to your pipeline in GiGS

Step-by-Step Instructions
- Initiate Adding a New Gig
- Navigate to the “Your Pipeline” page.
- Click the pink "Add New" + button in the top right-hand corner of the page.
- Enter Gig Information
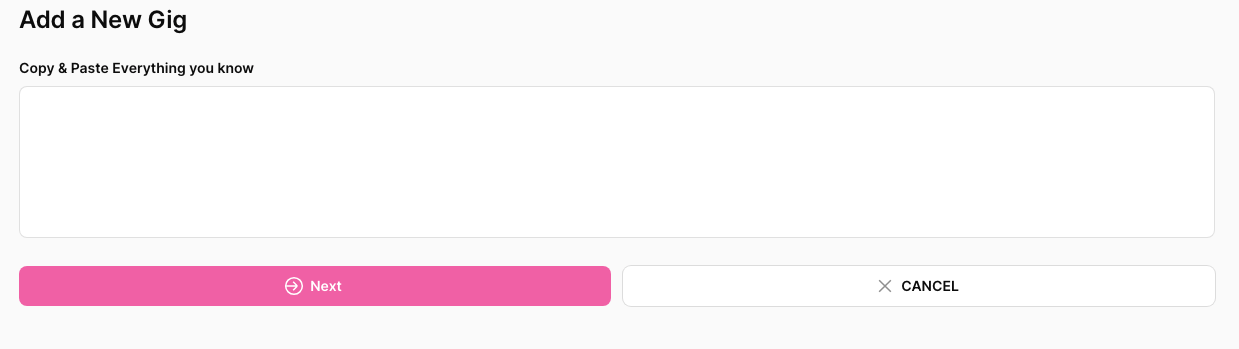
- Copy and paste (or type) all the information you have about the new gig into the white box. The more detailed the information, the better.
- Click the Next button.
- Review and Edit Gig Information
- The information you entered will be populated into a new gig record.
- Review and make any necessary edits to the gig information.
- Click the Next button.
- Review Contact Email Address
- Verify the accuracy of the populated contact email address.
- Click the Next button.
- Add Additional Contact Information
- Add any additional information you have about the new contact.
- Click the Next button.
- Review Client Company Information
- Verify the accuracy of the client company information.
- Click the Next button.
- Enter Your Fee
- Add your fee for the gig.
- Click the Add this Gig button. This will add the new gig into your existing pipeline in the LEAD column.
Viewing and Managing the New Gig
- Locate the New Gig:
- If you are in the Stage View of the “Your Pipeline” page, the new gig will appear in the LEAD column.
- If you are in the List View or Calendar View of the “Your Pipeline” page, the new gig will show up chronologically by date.
- Access Gig Information:
- Click the gig you just entered. This action will take you to the main information page for that gig.
- Update the Stage:
- Click the Edit Stage button to update the stage of the gig.
- Update the Status:
- Click the Edit Status button to update the status of the gig.
Feedback and Updates
We continuously improve our documentation based on user feedback and software updates. If you have any suggestions or need further assistance, please contact our support team.